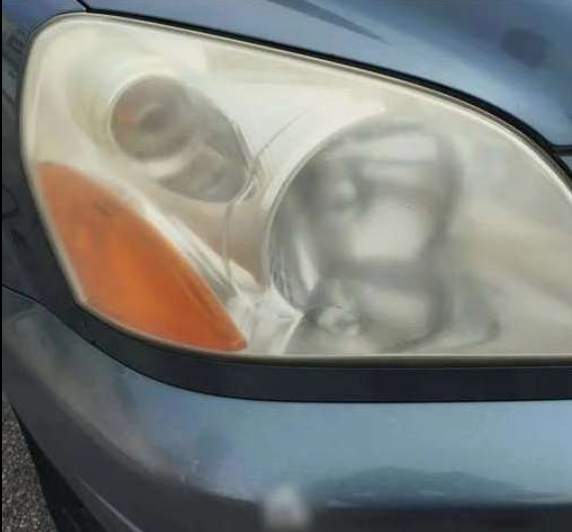
Over time, plastic headlights can lose their shine, get scratched, and even turn yellow. But don’t stress about paying big bucks to replace them—you can restore them to crystal-clear perfection in just 45 minutes for around $15. All you need is a few basic tools and some elbow grease. Here’s how to do it yourself!
Tools You’ll Need
- Flannel Polishing Cloth
- Latex Gloves
- Masking Tape
- Wet & Dry Sandpaper (1000 – 2500 grit)
Materials Needed
- Plastic Polish
Step-by-Step Guide to Restoring Your Headlights
- Wash and Sand Horizontally
- Start by cleaning the hazy headlight with warm, soapy water.
- Rinse thoroughly and let it dry.
- Mask the area around the lens to protect your car’s paint.
- Soak the sandpaper in water, then begin sanding in one direction, starting with the grit that suits your lens.
- Rinse and Sand Vertically
- Rinse the lens again and change your sanding direction to vertical.
- Keep sanding with progressively finer grit sandpapers (up to 2,500-grit) for the smoothest finish.
- Buff with Polish
- Once the lens is clean and dry, take a flannel cloth, wet a corner with polishing compound, and rub it onto the lens in circular motions with firm pressure.
- Keep polishing until the lens is smooth and shiny.
- Finish with a Final Buff
- Let the polish dry completely. Then, buff off any remaining polish with the clean part of the cloth.
- If there are still some cloudy spots, go back over them with more polish and repeat the process.
The Result: Crystal-Clear Headlights!
After you’ve finished, the lens should look brand-new. This simple, budget-friendly fix can save you hundreds of dollars, and you’ll feel great knowing you did it yourself! So why spend a fortune at the mechanic when you can get your headlights shining again for just a few bucks? Try this out, and get ready to drive with a clearer view of the road ahead!